Sunday, September 2, 2012
Logo
Just for fun I thought that I should make a logo for my blog and my printed circuit boards. It had to be simple, black and white, and relate to burnt transistors. I ended up with a logo that was Dangerous Prototypes-esque and I am pretty happy with the result. Enjoy.

Sunday, March 25, 2012
Microphone Array Beamformer Demo
Hi all, so for the better part of a year now, I have been working on designing and building an FPGA-based delay-and-sum microphone array beamformer. I have finally gotten a prototype working and have a quick demonstration in the video below. I will be posting more documentation on this project in the coming weeks. Enjoy!
Saturday, February 4, 2012
Etching PCBs
I learned how to make homemade printed circuit boards (PCBs) a couple years ago and I have always wanted to write a post on what I have learned. So here it is.
PCBs are great ways to take a project to the next level and move away from the breadboards and perfboards. PCBs can now be ordered from board houses like BatchPCB and Seeedstudio's PCB service (I prefer the second one because it is cheaper (~$2/board)), however their long lead times can make them inconvenient for prototypes or other small projects. Having the capacity to make PCBs at home allows you to come up with an idea in the morning and have a finished project by the end of the day. Here's how.
First you will have to procure the correct materials to manufacture the boards. This is the most expensive part as you have to buy a lot of start-up supplies but they last for a long time and are mostly only one time expenses.
The first thing you need are the copper clad boards which you will etch to make the PCBs. I use Jameco #169309 which is a double sided phenolic board. I actually only manufacture single sided boards because it is difficult to make double sided ones at home and align the two designs correctly. But it is nice to have the option and it doesn't cost too much more (especially when you buy in sets of 10).
The next thing on the list is a mini drill press. You need this if you will be manufacturing boards with through-hole components. You need a drill press drill straight holes and avoid breaking the fragile drill bits which are expensive. I bought the Mini Drill Kit (Jameco #2113252) which contains a drill, a stand, and two PCB drill bits (0.04" and 0.076"). If you already have a drill press, you only would need the drill bits which can also be found at Jameco.
You will also need the transfer paper. This is the glossy paper that you will used to transfer the PCB design to the copper before etching. I have found that Staples carries HP brochure paper which works well (Staples #604580). However the type of paper is often personal preference so feel free to experiment. All that has to stay constant is that it is glossy and I have found the thinner the better.
For the chemicals you will need Muriatic Acid (hydrochloric acid which can be found at Home Depot as it is used for cleaning concrete) and Hydrogen Peroxide (find at your nearest CVS). You will also want acetone (also found at Home Depot) to clean the copper boards and remove the toner after you etch the boards. However nail polish remover can also be used.
For safety supplies you will need a mask, chemical goggles (the ones that completely protect the eyes), and rubber gloves. You will be working with dangerous chemicals so it is better safe than sorry.
The rest of the items probably can be found in your house. You will need a clothes iron to transfer the design, a laser jet printer to print the design on the brochure paper, iron wool to clean off the copper boards, plastic trays, glass jars, a towel or rag to protect whatever surface you are making the boards on, and cotton balls.
If you do not have a laser jet printer don't worry. Simply print out the design at home and bring it to a copy center (I used Staples) and have them make a black and white copy (make sure it uses toner) on the glossy paper. However make sure to make multiple copies because you may have to attempt the transfer multiple times.
Now that you have the supplies you can begin the process of making your own PCBs. The first step is designing the board in a CAD software. I recommend using CadSoftUSA's EAGLE and getting their freeware version (it will ask you during install). Design your board and route it. Try to make the traces as large as possible and spaces between traces and pads as large as possible. I have successfully manufactured boards with 10 mil traces and 8 mil clearances but would recommend larger values (set in the Design Rule Check) until you have made several boards.
After the board is designed you need to print it out. First click the "Display" button in the toolbar in the board editor and click "None" and then select "Pads", "Vias", and the layer you wish to print ("Top" or "Bottom"). After doing this click on the print dialog and make sure the scale is set to "1", set area to "Full", select "Black", select "Solid", and select "Mirror" if you are printing the top layer.

After you have the designs printed out cut them out so you have a better sense of its dimensions. Then cut out a sufficiently sized piece of your copper clad board. I have found that a Dremel works really well but a hacksaw with a little elbow grease works too. Make sure to save the excess copper board as it can be used in future projects.


After the board is drilled you can solder the boards and fix any breaks with thin wire (like wire-wrapping wire). I have found that leaded solder flows much easier on copper boards and try to solder soon after manufacturing the board to avoid problems with oxidation.


Now that you have your finished project, make sure to test it to make sure there are no shorts or broken traces. Good Luck!
PCBs are great ways to take a project to the next level and move away from the breadboards and perfboards. PCBs can now be ordered from board houses like BatchPCB and Seeedstudio's PCB service (I prefer the second one because it is cheaper (~$2/board)), however their long lead times can make them inconvenient for prototypes or other small projects. Having the capacity to make PCBs at home allows you to come up with an idea in the morning and have a finished project by the end of the day. Here's how.
First you will have to procure the correct materials to manufacture the boards. This is the most expensive part as you have to buy a lot of start-up supplies but they last for a long time and are mostly only one time expenses.
The first thing you need are the copper clad boards which you will etch to make the PCBs. I use Jameco #169309 which is a double sided phenolic board. I actually only manufacture single sided boards because it is difficult to make double sided ones at home and align the two designs correctly. But it is nice to have the option and it doesn't cost too much more (especially when you buy in sets of 10).
The next thing on the list is a mini drill press. You need this if you will be manufacturing boards with through-hole components. You need a drill press drill straight holes and avoid breaking the fragile drill bits which are expensive. I bought the Mini Drill Kit (Jameco #2113252) which contains a drill, a stand, and two PCB drill bits (0.04" and 0.076"). If you already have a drill press, you only would need the drill bits which can also be found at Jameco.
You will also need the transfer paper. This is the glossy paper that you will used to transfer the PCB design to the copper before etching. I have found that Staples carries HP brochure paper which works well (Staples #604580). However the type of paper is often personal preference so feel free to experiment. All that has to stay constant is that it is glossy and I have found the thinner the better.
For the chemicals you will need Muriatic Acid (hydrochloric acid which can be found at Home Depot as it is used for cleaning concrete) and Hydrogen Peroxide (find at your nearest CVS). You will also want acetone (also found at Home Depot) to clean the copper boards and remove the toner after you etch the boards. However nail polish remover can also be used.
For safety supplies you will need a mask, chemical goggles (the ones that completely protect the eyes), and rubber gloves. You will be working with dangerous chemicals so it is better safe than sorry.
The rest of the items probably can be found in your house. You will need a clothes iron to transfer the design, a laser jet printer to print the design on the brochure paper, iron wool to clean off the copper boards, plastic trays, glass jars, a towel or rag to protect whatever surface you are making the boards on, and cotton balls.
If you do not have a laser jet printer don't worry. Simply print out the design at home and bring it to a copy center (I used Staples) and have them make a black and white copy (make sure it uses toner) on the glossy paper. However make sure to make multiple copies because you may have to attempt the transfer multiple times.
Now that you have the supplies you can begin the process of making your own PCBs. The first step is designing the board in a CAD software. I recommend using CadSoftUSA's EAGLE and getting their freeware version (it will ask you during install). Design your board and route it. Try to make the traces as large as possible and spaces between traces and pads as large as possible. I have successfully manufactured boards with 10 mil traces and 8 mil clearances but would recommend larger values (set in the Design Rule Check) until you have made several boards.
After the board is designed you need to print it out. First click the "Display" button in the toolbar in the board editor and click "None" and then select "Pads", "Vias", and the layer you wish to print ("Top" or "Bottom"). After doing this click on the print dialog and make sure the scale is set to "1", set area to "Full", select "Black", select "Solid", and select "Mirror" if you are printing the top layer.

My printed designs.
After you have the designs printed out cut them out so you have a better sense of its dimensions. Then cut out a sufficiently sized piece of your copper clad board. I have found that a Dremel works really well but a hacksaw with a little elbow grease works too. Make sure to save the excess copper board as it can be used in future projects.


These are the two boards I will be using. They are excess from previous projects.
Next you have to clean the boards before you can transfer the design. This is a very important step because if there is any junk on the copper surface, the toner will not transfer correctly creating problems later on. First make sure to be wearing rubber gloves to prevent oils from your hands contaminating the boards. Then use acetone or nail polish to clean of any oils or dirt currently on the board. After doing so, use steel wool to scrape off the layer of oxidation and other dirt from the copper. After you should be left with a shiny pinkish copper surface. Make sure to clean both sides of the board!

Properly cleaned boards. Notice the black spot on the bottom right. Make sure you do this on a towel that can be trashed!
After cleaning the boards it is time to transfer the design. This is the most important part of the process and how well you do it will determine if your boards come out. First get your clothes iron (make sure there is no water inside if you have one with steam capability) and turn it to its highest setting. After the iron heats up, lay the design on the copper board and place the hot iron on top of it and apply even, firm pressure. I typically hold it in this position for about 20 seconds. After lift up the iron up and begin heating section of the board. I like to heat the board for about 7 minutes in this fashion to ensure a good transfer. After you are done let the board with the design attached cool for several minutes.

Extreme Ironing!
After the board is cooled place it inside a tray of water and let is soak for about 10 minutes. This will turn most of the paper into pulp so you can peel it off leaving only the toner. Here be careful and only peel if the paper is sufficiently soaked-do not force it. After you have removed the paper, make sure to scrape off as much of the pulp in between traces and pads as the chemical bath doesn't etch through it well meaning you may have shorts that you will have to scratch away. However you are doing a balancing act because I would rather have to scratch away traces than do more green wire fixes because I scraped away the toner. This is also the stage where you can fix any parts where the toner didn't transfer. Use a permanent marker to draw these traces, making sure to use multiple layers. If the transfer wasn't good and you want to try again, simply wipe off the toner with acetone or nail polish remover and try again.

My boards with the transferred designs and Sharpie-ed fixes.
After you have the boards with the transferred designs, it is time to mix the etching solution. Many people use Ferric Chloride as their etchant but I prefer using Hydrochloric acid with Hydrogen Peroxide because it is translucent allowing you to see the etching progress, cheap, and doesn't stain like Ferric Chloride. Mix these chemicals in a plastic tray at the ratio of 2 parts Hydrogen Peroxide to 1 part Hydrochloric acid. When you do so make sure to pour in the Hydrogen Peroxide first and then the acid to reduce the risk of burns. I use a glass jar to pour in the chemicals because often their cases are unwieldy and allows me to measure the amount beforehand. Make sure you are wearing your safety gear! Then place the boards into the bath. The solution will turn green and this is the copper that is being etched creating Cupric Chloride. This etchant works by first oxidizing the copper (the Hydrogen Peroxide) and then the Hydrochloric acid eats the oxidized portion away. The toner protects the surface underneath from being oxidized and there for etched. During the etching process, tilt the boards so the etchant reaches both the top and bottom using some prop (I use chopsticks). I have noticed that the bottom of the board etches faster so make sure to flip them every once in a while. Etching takes about 10 minutes and make sure to avoid over-etching the boards as this creates a lot of work later on. After you have finished etching the boards, remove them from the solution and place them in water to stop the etching process. When you are finished, you should neutralize the solution using about a pound of baking soda. Make sure to place it in small increments because it bubbles violently early on much like vinegar and baking soda.

Board being etched. Notice the copper in the corners has been etched away.

The etched board.

Time to neutralize!
Once you have the etched board wipe off the toner with acetone or nail polish remover. Next mark any breaks or shorts you find with a marker. To fix shorts use a pen knife or the like that can cut the traces. Next cut the boards if they were panelized and you can begin drilling.

The drill press.

A drilled board.

Finished boards with breaks fixed.

Done!
Sunday, January 15, 2012
My Happy Place
My happy place is my workbench. It is a place where I can work on my projects without interruption and has all the tools I need to do so. I think that having a proper workbench is necessary for anyone serious about electronics. Below is a list of what I have in my workbench area and think you should too. But be warned, things might get a little messy!
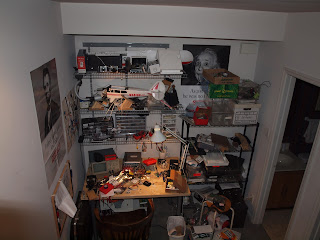

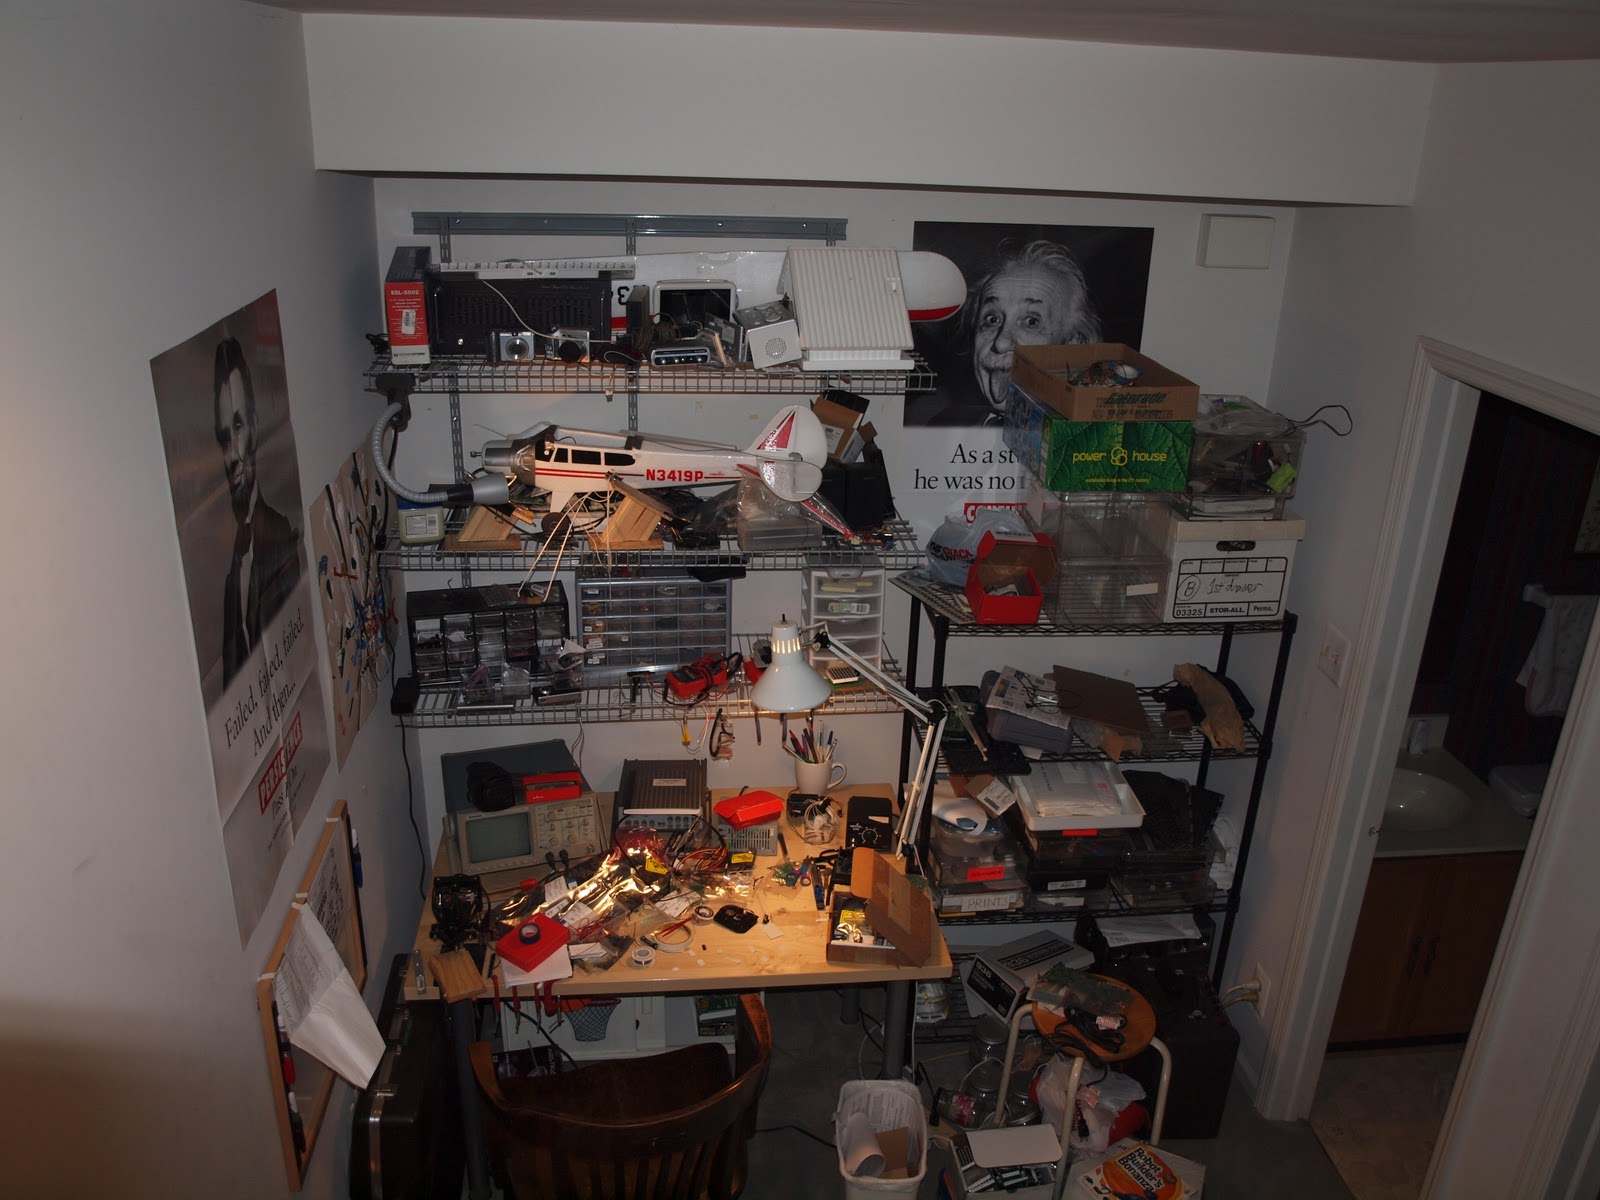
My Nerd-cave
As you can see, I convinced my mom to set aside a section of our basement to my pursuit of electronics. This is where I house my projects, supplies, tools, and other old electronics. We installed shelving because I quickly ran out of real estate on my bench. And as you can see I am now running out of real estate on the shelves! On the top shelf, I have electronics I want to incorporate in a project but don't have an immediate use for. Here lie an old equalizer, some speakers, old digital cameras (broken after I tried, unsuccessfully, to convert them to see only IR), and a solar house kit I had bought. Just below are the electronics I use in my projects or are ongoing projects. There rests my RC plane (which I hope to one day make into an UAV), stands I use for soldering, speakers for amplifiers I build, and a router I am experimenting with (I hope to make a router-based robot). The bottom shelf is where I house all of my components in a series of drawers. On the right of the workbench is where I keep several projects like my award-winning LED fedora and an amplifier I had built. I also keep a lot of my tools on these set of shelves like my extra soldering irons, my circuit board fabrication tools and kit, and my trusty Dremel. I also keep extra wall warts, heat sinks, wire, electrical tape, and other supplies.

My messy workbench
Here you can see my cluttered workbench. Here reside my projects I am currently working on and little experiments. Currently it is filled with parts for the Museum Without Walls project and my senior research project. On my workbench you can see my tools that I use most often. I have an oscilloscope which I am borrowing from my school, a function generator (also borrowed), a computer power supply to power my projects, a mini drill press for milling PCBs, and my trusty SparkFun soldering iron. Here is where I build most of my projects and solder.
So that is my work area and I think that it is pretty comprehensive. Here are the things I think every hobbyist should have in their work space.
Tools:
-Soldering iron (I recommend SparkFun's analog adjustable one)
-Power supply (I use an old desktop computer power supply with 3.3, 5, and 12 volt outputs)
-Needle-nose pliers
-Wire strippers (make sure they can at least strip 28 AWG wire)
-Diagonal cutters
-Multimeter
-Screwdriver set (with small heads and ideally includes the Torx (star-shaped) attachments)
-Oscilloscope (optional, unless you are doing complicated electronics)
-Signal generator (optional, super helpful for building and debugging analog circuits)
-Solder vacuum (optional, I use this as an alternative to desoldering braid because it is faster and easier)
-Tweezers (necessary if you plan on doing SMD work)
-Dremel (a versatile tool if you plan on building housings or other parts)
-Fume extractor (this is nice to have if you do a lot of soldering. I built mine out of an old computer fan which just sucks away the fumes from my face)
-Whiteboard (great for jotting down ideas and notes)
Supplies:
-Wire (I use 24 AWG)
-Breadboards
-Resistors (get a set of commonly used values)
-LEDs
-Solder (I have both leaded and lead-free which I use depending on the difficulty of the soldering)
-Desoldering Braid
-Electrical and masking tape (electrical tape is great for insulation and masking tape helps hold boards and parts in place for soldering)
-Arduino (this microcontroller is a must for hobbyists)
I think that the above supplies will be a great starting place for your own workbench and it will quickly expand into a comprehensive working space.

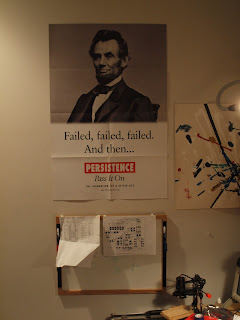
Everyone needs a whiteboard and motivation!
Monday, January 2, 2012
New Year's Resolution
Here's to welcoming a productive and exciting New Year! My New Year's resolution is to post at least once a week on my blog. This will encourage me to document my projects more thoroughly and work on new ones.
Subscribe to:
Posts (Atom)